Some of the Certified Instructors are participating in a Block Challenge. We are given a Block or Tool to use to make a block. July was the first month. Every Thursday of the month we post a picture on Instagram and tag the other CIs who are participating and tell a little bit about what we are doing. The first week we show the fabrics we are using (Fabric Pull). The next two weeks we show a sneak peak of the block (Sneak Peak #1 and Sneak Peak #2). The fourth week we show the block (Reveal).
July Challenge was the Four Patch. I used the Four Patch Square Up tool. What a difference it makes to make your blocks a little bigger and then trim them down! It is worth all the extra effort. This post is about my progress in the Block Challenge. I made a baby quilt. I do not have the binding finished because I want to hand stitch it down. It is ready to stitch, but I had another quilt to finish last night (which I did finish).
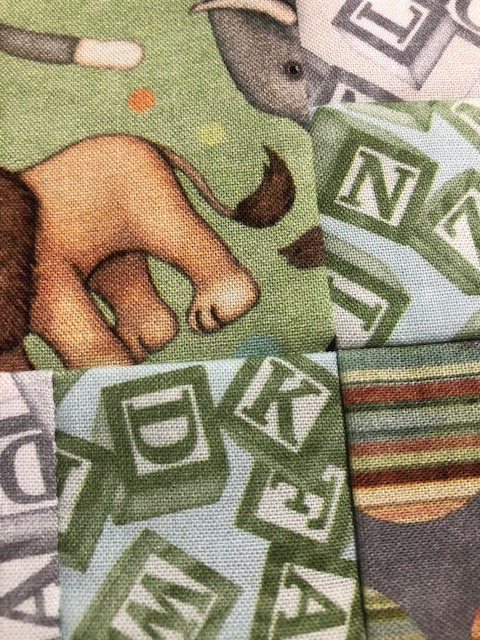
Fabric Pull
These are the fabrics I chose. They are baby prints from QT Fabrics. They are now in the Sale Room at Quilters Journey.
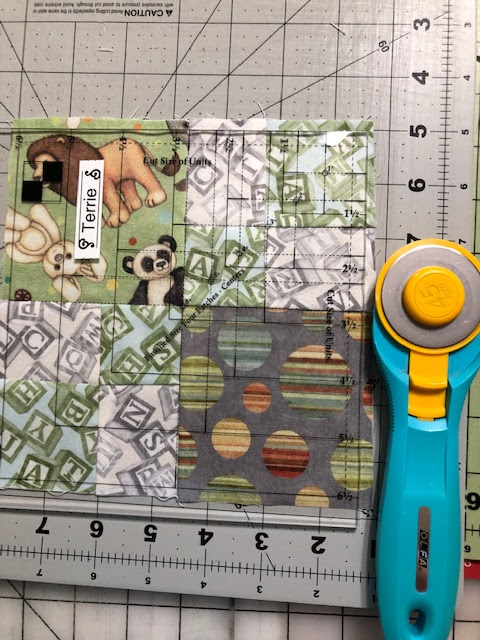
I made Four Patches with the gray and green prints. I made them over sized. I trimmed two sides with the green in the corner. These are the two sides the I will sew to the other units. I must trim the sides that will be sewn to the next units. I trimmed with the center at 3, which would be for a 3" block.
Sneak Peak #1
Here is the pile of trimmed units. I don't remember how many I made.
I sewed these units to larger squares of the large print fabrics. I did not take a photo of those, but you will see the block later. I was pressing these units and laid them on my bed. Sadie is guarding them. I thought about using this photo as one of the Sneak Peak photos, but I didn't. The caption would have been "Sadie doesn't want you to see yet!".
Sneak Peak #2
A close up of the center of the Four Patch Block.
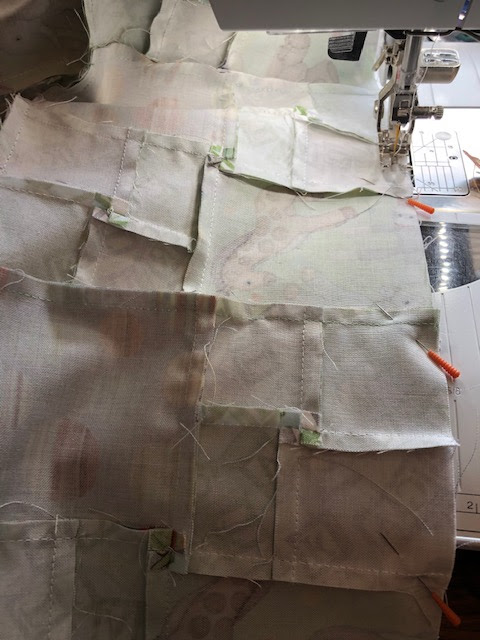
After sewing the units together, I trimmed them to size using the Four Patch Square Up tool by Studio 180 Design. The center is at the 6 for a 6" block. This time I trimmed all four sides. I trimmed the right side and top, rotated the block, and then trimmed the other two sides. They are now perfect 6" blocks to sew together.
I decided all the blocks had to be laid out and sewn together the same direction. The stripes in the circles all had to go the same direction.
I sewed the blocks together into rows.
I chain pieced to make the process go faster.
After the rows were together, I pressed the seams. One row I pressed the seams to the right and the next row I pressed them to the left. This will make it easier to sew the rows together because the seams will "nest" together.
Then I sewed the rows together. I pin at the seams between each block to make sure they line up correctly. I remove the pin when I get to it and do not sew over the pins.
Reveal
Here is the quilt top, ready for quilting.
Here is a closer photo of the quilt top.
I sewed before church one Sunday morning. This is a photo of my shirt. I was covered in threads. Had to get the lint roller out to get them all off.
The quilt top is on the longarm, ready to be quilted.
I quilted it with a pantograph (all over design) using my computerized machine. I used the pantograph called "Baby Curls". It looks really cute.
Binding. Striped fabric from the same line by QT Fabrics. I cut it on the diagonal to get the stripe I wanted. I use a walking foot to sew my binding on. It helps feed all those layers of fabric through. I sewed the binding to the front of the quilt. I will turn it to the back and hand stitch it down.
Just have to finish the binding. I will post a photo when I get it done. Then it will be ready to go to a special baby. I don't have one in mind yet. One of the quilt guilds I belong to collects baby quilts for donations. I can always find a place for it. Baby quilts are usually quick and easy to make. There are several places that need them. So, there is always a need. We have a new homeless shelter in my home town. They are focused on young mothers, so this may go there. For now, it will be another quilt in my Studio 180 Design samples. But, first, I have to finish it!
Happy Quilting!
Terrie
Instagram:
@terriecamdenwelch